搜索到
1108
篇与
的结果
-
 Ubuntu 20.04 Focal 升级 Ubuntu 22.04 Jammy 本文将指导如何升级 Ubuntu 20.04 Focal 到 Ubuntu 22.04 Jammy。前言Ubuntu 22.04 Jammy Jellyfish 已正式发布,如果您使用 Ubuntu 20.04,那么可以参考本站教程升级。准备工作除非你是物理服务器,以及没有用过奇奇怪怪定制或修改的内核的 KVM 构架的 VPS 和云主机,否则升级大版本更新内核是有一定机率导致 Grub 加载失败的,切记备份重要数据!OpenVZ 6 和 LXC 构架的 VPS 是无法升级的,因为他们没有自己独立的内核再强调一遍,一定要备份重要数据!以下操作需要在 root 用户下完成,请使用 sudo -i 或 su root 切换到 root 用户进行操作更新系统首先需要更新你当前的系统apt update apt upgrade -y apt dist-upgrade -y apt autoclean apt autoremove -y 如果内核更新了,建议重启让最新的内核生效。升级系统我们有两种方法升级到最新的系统,第一种是和 Debian 类似,手工修改 apt 源文件:首先更新 apt 源,替换 focal 为 jammy:sed -i 's/focal/jammy/g' /etc/apt/sources.list sed -i 's/focal/jammy/g' /etc/apt/sources.list.d/*.list 默认的系统 apt 源文件 /etc/apt/sources.list 应该是类似这样的:# See http://help.ubuntu.com/community/UpgradeNotes for how to upgrade to # newer versions of the distribution. deb http://archive.ubuntu.com/ubuntu/ jammy main restricted # deb-src http://archive.ubuntu.com/ubuntu/ jammy main restricted ## Major bug fix updates produced after the final release of the ## distribution. deb http://archive.ubuntu.com/ubuntu/ jammy-updates main restricted # deb-src http://archive.ubuntu.com/ubuntu/ jammy-updates main restricted ## N.B. software from this repository is ENTIRELY UNSUPPORTED by the Ubuntu ## team. Also, please note that software in universe WILL NOT receive any ## review or updates from the Ubuntu security team. deb http://archive.ubuntu.com/ubuntu/ jammy universe # deb-src http://archive.ubuntu.com/ubuntu/ jammy universe deb http://archive.ubuntu.com/ubuntu/ jammy-updates universe # deb-src http://archive.ubuntu.com/ubuntu/ jammy-updates universe ## N.B. software from this repository is ENTIRELY UNSUPPORTED by the Ubuntu ## team, and may not be under a free licence. Please satisfy yourself as to ## your rights to use the software. Also, please note that software in ## multiverse WILL NOT receive any review or updates from the Ubuntu ## security team. deb http://archive.ubuntu.com/ubuntu/ jammy multiverse # deb-src http://archive.ubuntu.com/ubuntu/ jammy multiverse deb http://archive.ubuntu.com/ubuntu/ jammy-updates multiverse # deb-src http://archive.ubuntu.com/ubuntu/ jammy-updates multiverse ## N.B. software from this repository may not have been tested as ## extensively as that contained in the main release, although it includes ## newer versions of some applications which may provide useful features. ## Also, please note that software in backports WILL NOT receive any review ## or updates from the Ubuntu security team. deb http://archive.ubuntu.com/ubuntu/ jammy-backports main restricted universe multiverse # deb-src http://archive.ubuntu.com/ubuntu/ jammy-backports main restricted universe multiverse ## Uncomment the following two lines to add software from Canonical's ## 'partner' repository. ## This software is not part of Ubuntu, but is offered by Canonical and the ## respective vendors as a service to Ubuntu users. # deb http://archive.canonical.com/ubuntu jammy partner # deb-src http://archive.canonical.com/ubuntu jammy partner deb http://archive.ubuntu.com/ubuntu jammy-security main restricted # deb-src http://archive.ubuntu.com/ubuntu jammy-security main restricted deb http://archive.ubuntu.com/ubuntu jammy-security universe # deb-src http://archive.ubuntu.com/ubuntu jammy-security universe deb http://archive.ubuntu.com/ubuntu jammy-security multiverse # deb-src http://archive.ubuntu.com/ubuntu jammy-security multiverse 国内服务器可以替换 archive.ubuntu.com 为 mirrors.tuna.tsinghua.edu.cn然后我们再次执行更新系统:apt update apt upgrade -y apt dist-upgrade -y 更新过程种会提示一些软件是否需要自动重启,选 Yes 即可,以及一些软件的配置文件是否需要更新,按照自己的情况选择即可,默认回车即视为使用旧的配置文件,一般会出现在 OpenSSH 等软件的更新上。更新后删除不必要的软件和依赖:apt autoclean apt autoremove -y 然后我们使用 reboot 命令重启系统,耐心等待后,查看最新的系统版本:root@ubuntu ~ # lsb_release -a No LSB modules are available. Distributor ID: Ubuntu Description: Ubuntu 22.04 LTS Release: 22.04 Codename: jammy root@ubuntu ~ # uname -a Linux ubuntu 5.15.0-25 #4-Ubuntu SMP Fri Apr 1 07:36:38 UTC 2022 x86_64 x86_64 x86_64 GNU/Linux 这时我们就已经更新到了最新的 Ubuntu 22.04 Jammy 和内核了。第二种方法是使用 do-release-upgrade 命令首先安装 update-manager-core 软件包:apt install update-manager-core 然后运行 do-release-upgrade -d 即可更新,其他方法和上面一样,不再详细解释。如果添加过一些 PPA 源,如果他们还未发布最新版本的软件,可以临时先取消,比如add-apt-repository --remove ppa:ondrej/php
 -
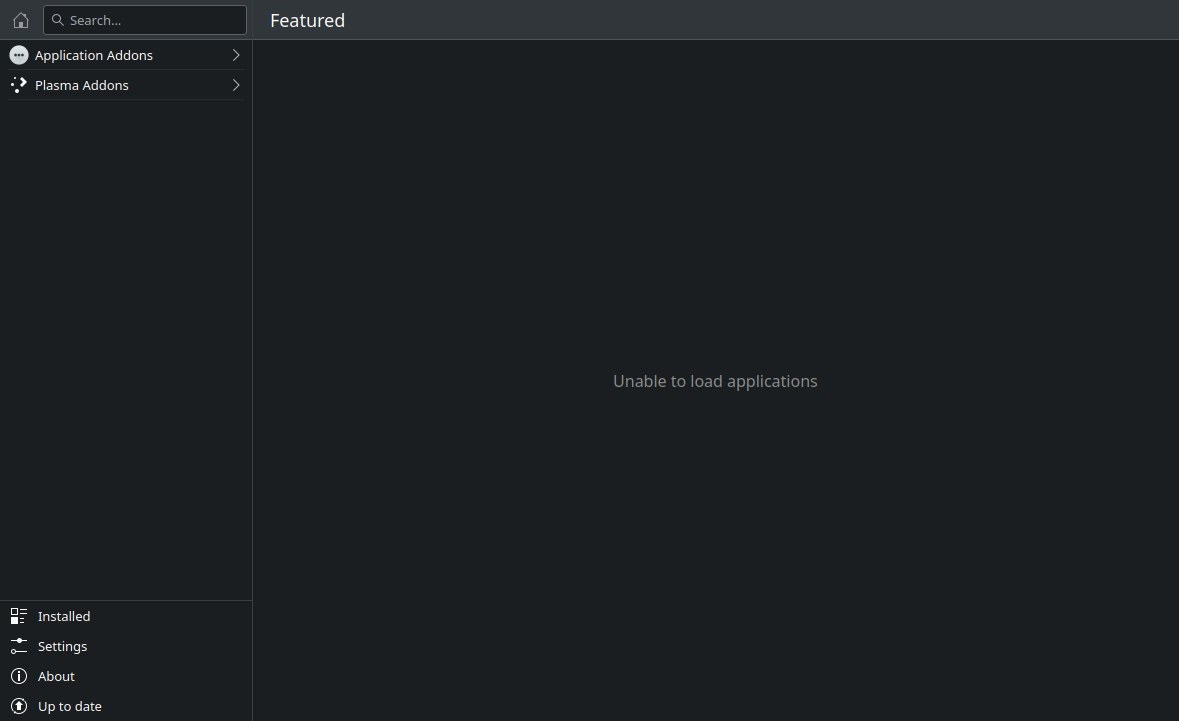
Arch Linux 下解决 KDE Plasma Discover 的 Unable to load applications 错误 本文将指导在 Arch Linux 下解决 KDE Plasma Discover 的 unable to load applications 错误。前言使用 Arch Linux 安装 KDE Plasma 桌面以后,KDE 的软件管理器 Discover 一打开就提示 Unable to load applications 错误:其他所有设置也无法使用:解决方法参考这个帖子,直接安装 packagekit-qt5 包即可解决:sudo pacman -S packagekit-qt5 重新打开 Discover,一切问题解决:
-
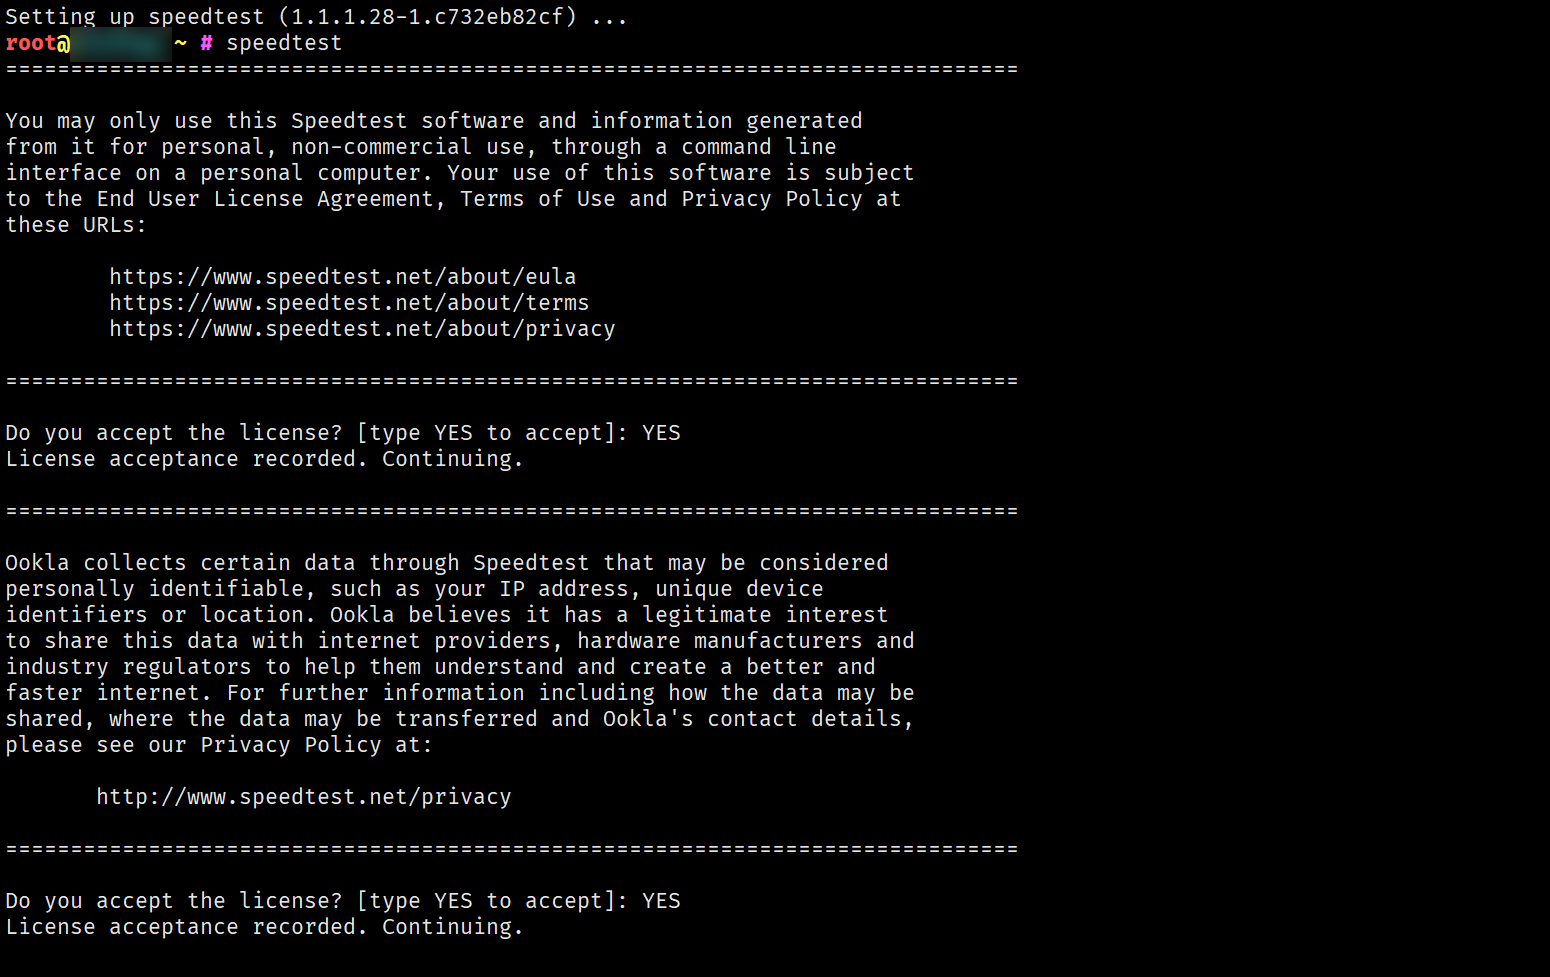
Debian 使用 Speedtest CLI 进行测速 本文将指导如何在 Debian 12 和 Ubuntu 22.04 下安装并使用 Speedtest CLI 进行测速。安装 Speedtest CLISpeedtest CLI 是 Ookla 官方推出的 Linux / BSD 下的 CLI 工具,方便我们在服务器里直接测试公网带宽速度。首先,导入 GPG Key 并添加源:apt install -y lsb-release ca-certificates apt-transport-https curl gnupg dpkg curl -sSL https://packagecloud.io/ookla/speedtest-cli/gpgkey | gpg --dearmor > /usr/share/keyrings/speedtest.gpg echo "deb [arch=$(dpkg --print-architecture) signed-by=/usr/share/keyrings/speedtest.gpg] https://packagecloud.io/ookla/speedtest-cli/debian/ $(lsb_release -sc) main" > /etc/apt/sources.list.d/speedtest.list apt install -y lsb-release ca-certificates apt-transport-https curl gnupg dpkg curl -sSL https://packagecloud.io/ookla/speedtest-cli/gpgkey | gpg --dearmor > /usr/share/keyrings/speedtest.gpg echo "deb [arch=$(dpkg --print-architecture) signed-by=/usr/share/keyrings/speedtest.gpg] https://packagecloud.io/ookla/speedtest-cli/ubuntu/ $(lsb_release -sc) main" > /etc/apt/sources.list.d/speedtest.list 然后更新系统并安装 speedtest:apt update apt install speedtest -y 使用 Speedtest CLI安装完毕后我们即可使用默认的 speedtest 命令选择最近的节点并使用默认的网络测速,提示 Do you accept the license? [type YES to accept] 时,输入 YES 并回车即可:高级用法输入 speedtest -h 即可查看 speedtest 的命令参数:root@debian ~ # speedtest -h Speedtest by Ookla is the official command line client for testing the speed and performance of your internet connection. Version: speedtest 1.1.1.28 Usage: speedtest [<options>] -h, --help Print usage information -V, --version Print version number -L, --servers List nearest servers -s, --server-id=# Specify a server from the server list using its id -I, --interface=ARG Attempt to bind to the specified interface when connecting to servers -i, --ip=ARG Attempt to bind to the specified IP address when connecting to servers -o, --host=ARG Specify a server, from the server list, using its host's fully qualified domain name -p, --progress=yes|no Enable or disable progress bar (Note: only available for 'human-readable' or 'json' and defaults to yes when interactive) -P, --precision=# Number of decimals to use (0-8, default=2) -f, --format=ARG Output format (see below for valid formats) --progress-update-interval=# Progress update interval (100-1000 milliseconds) -u, --unit[=ARG] Output unit for displaying speeds (Note: this is only applicable for ‘human-readable’ output format and the default unit is Mbps) -a Shortcut for [-u auto-decimal-bits] -A Shortcut for [-u auto-decimal-bytes] -b Shortcut for [-u auto-binary-bits] -B Shortcut for [-u auto-binary-bytes] --selection-details Show server selection details --ca-certificate=ARG CA Certificate bundle path -v Logging verbosity. Specify multiple times for higher verbosity --output-header Show output header for CSV and TSV formats Valid output formats: human-readable (default), csv, tsv, json, jsonl, json-pretty Machine readable formats (csv, tsv, json, jsonl, json-pretty) use bytes as the unit of measure with max precision Valid units for [-u] flag: Decimal prefix, bits per second: bps, kbps, Mbps, Gbps Decimal prefix, bytes per second: B/s, kB/s, MB/s, GB/s Binary prefix, bits per second: kibps, Mibps, Gibps Binary prefix, bytes per second: kiB/s, MiB/s, GiB/s Auto-scaled prefix: auto-binary-bits, auto-binary-bytes, auto-decimal-bits, auto-decimal-bytes比较实用的有:指定出口网卡:speedtest -I 指定网卡名称 指定出口 IP:speedtest -i IP 地址 注意指定网卡或 IP 后可能会出现 [error] Error: [0] Cannot open socket 的错误提示,忽略即可。查看附近的测速节点列表:speedtest -L 指定某个测速节点:speedtest -s 测速节点 ID 最后秀一下我们的 40Gbps 公网带宽服务器:
-
Debian / Ubuntu 手工添加 Swap 分区 本文将指导如何在 Debian 11 和 Ubuntu 22.04 下手工添加 Swap 分区。准备工作首先,检查你的系统是否已经有 Swap 分区:swapon -s 或free -m 如果没有返回结果或者 free -m 中 Swap 一列数值是 0,则表示你的系统没有 Swap 分区。创建 SWAP 分区我们可以使用 fallocate 命令创建一个 1GB 大小的 Swap 分区:fallocate -l 1G /swapfile 如果这个命令无法使用,请安装 util-linux 包:apt install util-linux 然后设置这个文件的权限:chmod 600 /swapfile 然后激活 SWAP 分区mkswap /swapfile swapon /swapfile 此时,你可以使用 swapon -s 或 free -m 命令查看 Swap 分区是否已经激活。设置开机自启我们需要编辑 /etc/fstab 这个文件,加入下面的内容即可:echo "/swapfile swap swap defaults 0 0" >> /etc/fstab 大功告成,使用 free -m 命令查看 Swap 分区是否正确:调整系统内核 Swappiness 值Swapiness 是 Linux 内核的一个属性,定义了系统使用交换空间的频率,Swapiness 的值在 0 到 100 之间 (默认是 60),一个低的值会使内核尽可能地避免交换,而一个高的值会使内核更积极地使用交换空间。这个值默认是 60,我们可以使用 cat /proc/sys/vm/swappiness 命令查看当前值。一般我们可以给他改成 10:echo "vm.swappiness=10" >> /etc/sysctl.conf 然后使用 sysctl -p 命令使其生效。关闭 Swap有时候我们需要关闭 Swap 分区,可以使用下面的命令:首先,停用 Swap 分区:swapoff -v /swapfile 然后检查 /etc/fstab,删除 /swapfile swap swap defaults 0 0 这一行。最后删除 /swapfile 这个文件:rm /swapfile
-
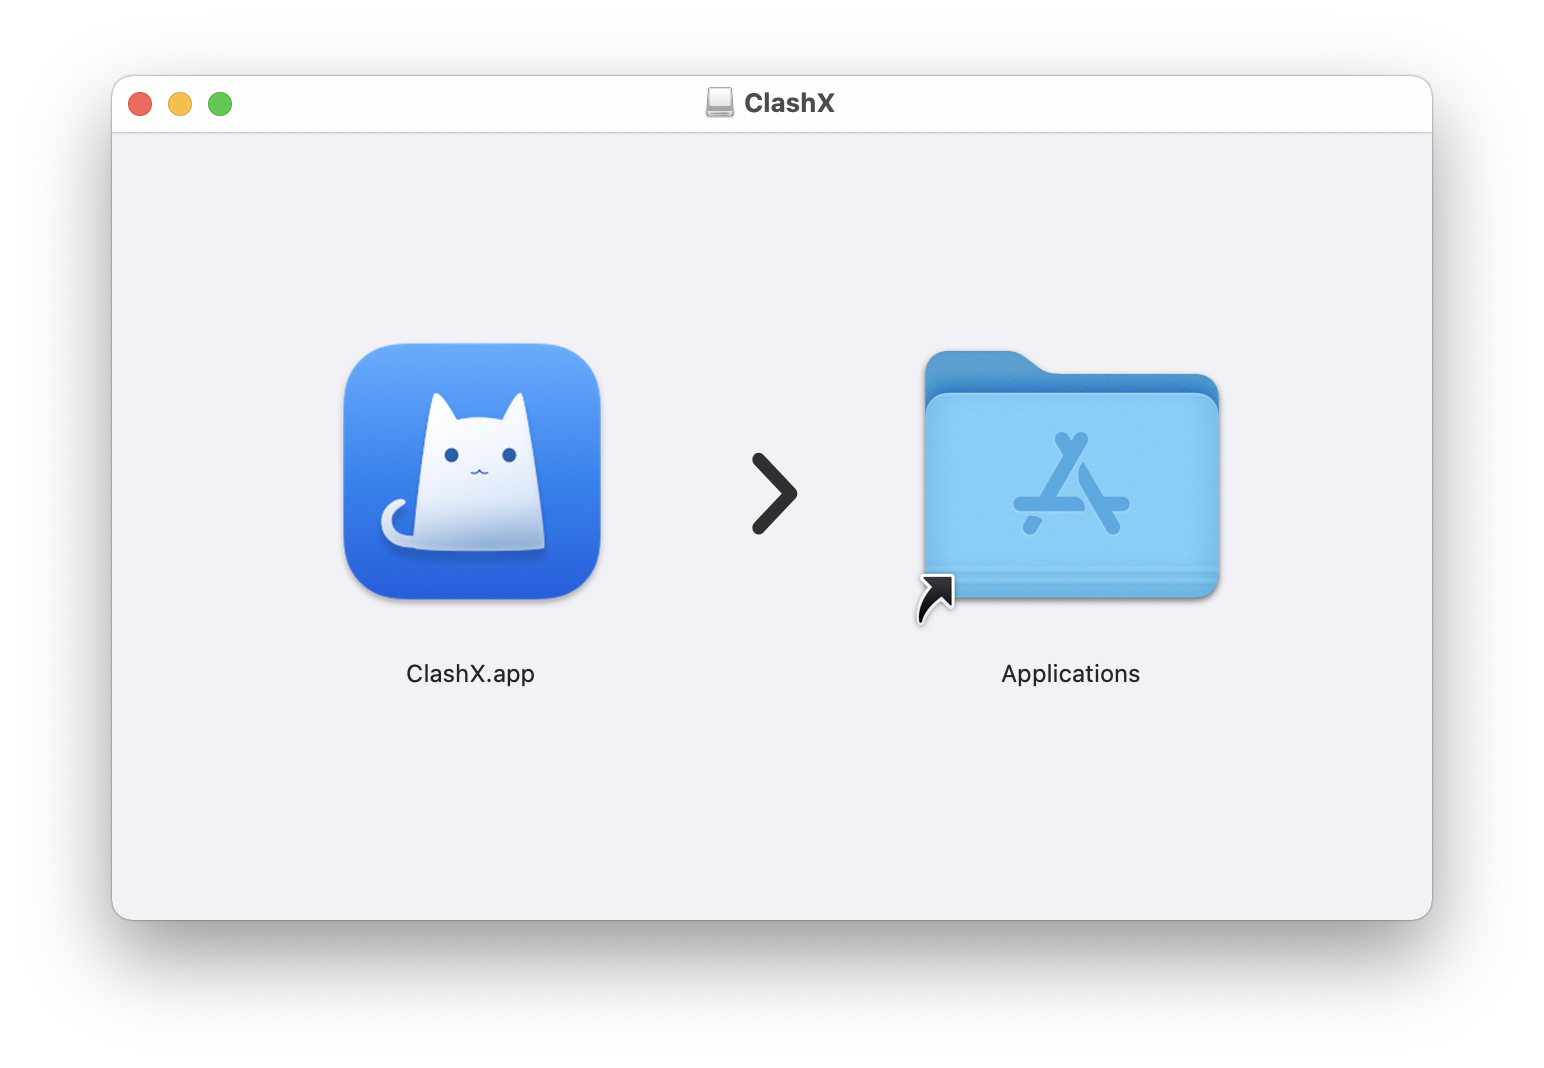
如何在 ClashX 上配置服务 1. 介绍主流支持——使用该客户端的用户,我们可以为你解答使用该软件遇到的所有问题。免费使用订阅节点 Clash 是一个基于Go语言开发的跨平台代理程序。 ClashX 是 Clash Core 在 macOS 上的图形化程序,方便用户配置和使用。 初次配置之前,推荐完整阅读一遍教程,再进行操作。 苹果电脑—点击下载ClashX 客户端 打开下载完成的 dmg 映像文件,将 ClashX 添加到应用程序文件夹中。在网站 “仪表盘” 使用 “一键订阅” => “导入到clash” 前往官网 “仪表盘” 点击 “一键订阅” => “复制订阅链接” 打开 ClashX,点击菜单栏中的 ClashX 图标 打开菜单,进入 配置 > 托管配置 > 管理。 在 托管的配置文件 窗口,点击 “添加” 在 Url 一栏中粘贴订阅链接,Config Name 为配置文件名,可以随意填写或留空。 添加成功后 ClashX 会自动从链接下载配置文件,等待 “更新时间” 刷新后,即可关闭窗口。 打开 ClashX 菜单中的 “设置为系统代理”,ClashX 便开始接管系统流量。 ClashX 的默认出站模式为 “规则”,不推荐选择 “全局” 与 “直连”。 敬告 Clash 支持通过策略组,对不同的网站使用不同的策略。合理使用分流可以提升您的使用体验。 ? Proxies 为节点策略组,可在其中选择节点。 ? Domestic 决策中国大陆网站,默认 DIRECT 直连。 ☁️ Others 决策没有收录进规则的网站,默认使用 ? Proxies 代理访问。 Tips: 想删除多余的配置? 进入 配置 > 托管配置 > 管理,在 “托管的配置文件” 窗口,记住想要删除的配置的名称,之后删除它。 进入 配置 > 打开本地配置文件夹,把对应名称的 .yaml 文件删除即可。