搜索到
1713
篇与
的结果
-
 Nginx 使用 split_clients 进行简易 A/B 测试 本文将介绍在 Nginx 配置简易 A/B 测试的姿势。背景前提有时候我们需要简单的做一些 A/B 测试,并不需要复杂的判断条件,这时候我们可以用到 Nginx 的 ngx_http_split_clients_module 模块。安装 ngx_http_split_clients_module 模块一般来说这个模块已经自带,如果没有的话推荐安装我们打包的 N.WTF配置 Nginx这里举例,我们想要 20% 的用户跳转到网址 https://example.com/,30% 的用户跳转到网址 https://example.org/,剩下的跳转到网址 https://examle.edu/:split_clients "${remote_addr}AAA" $variant { 20% https://example.com/; 30% https://example.org/; * https://example.edu/; } server { listen 80; listen [::]:80; server_name _; return 302 ${variant}; } 上述例子中,按照访客请求的 IP 地址 加上 AAA 字符串 会使用 MurmurHash2 转换成数字,如果得出的数字在前 20%,那么 $variant 值为 https://example.com/,相应的在中间 30% 区间的值为 https://example.org/,其他的为 https://example.edu/。然后我们找两台不同 IP 的机器进行测试:机器 A:root@debian ~ # curl -I 192.0.2.2 HTTP/1.1 302 Moved Temporarily Server: nginx Date: Sat, 02 Jul 2022 20:51:43 GMT Content-Type: text/html Content-Length: 138 Connection: keep-alive Location: https://example.com/ 机器 B:root@debian ~ # curl -I 192.0.2.2 HTTP/1.1 302 Moved Temporarily Server: nginx Date: Sat, 02 Jul 2022 20:52:12 GMT Content-Type: text/html Content-Length: 138 Connection: keep-alive Location: https://example.org/ 然后就可以有更灵活的用法,比如指定不同的目录:root /var/www/${variant}; 指定不同的首页:index index-${variant}.html; 读者可以举一反三,这个比较简易的 A/B 测试就完成啦~
 -
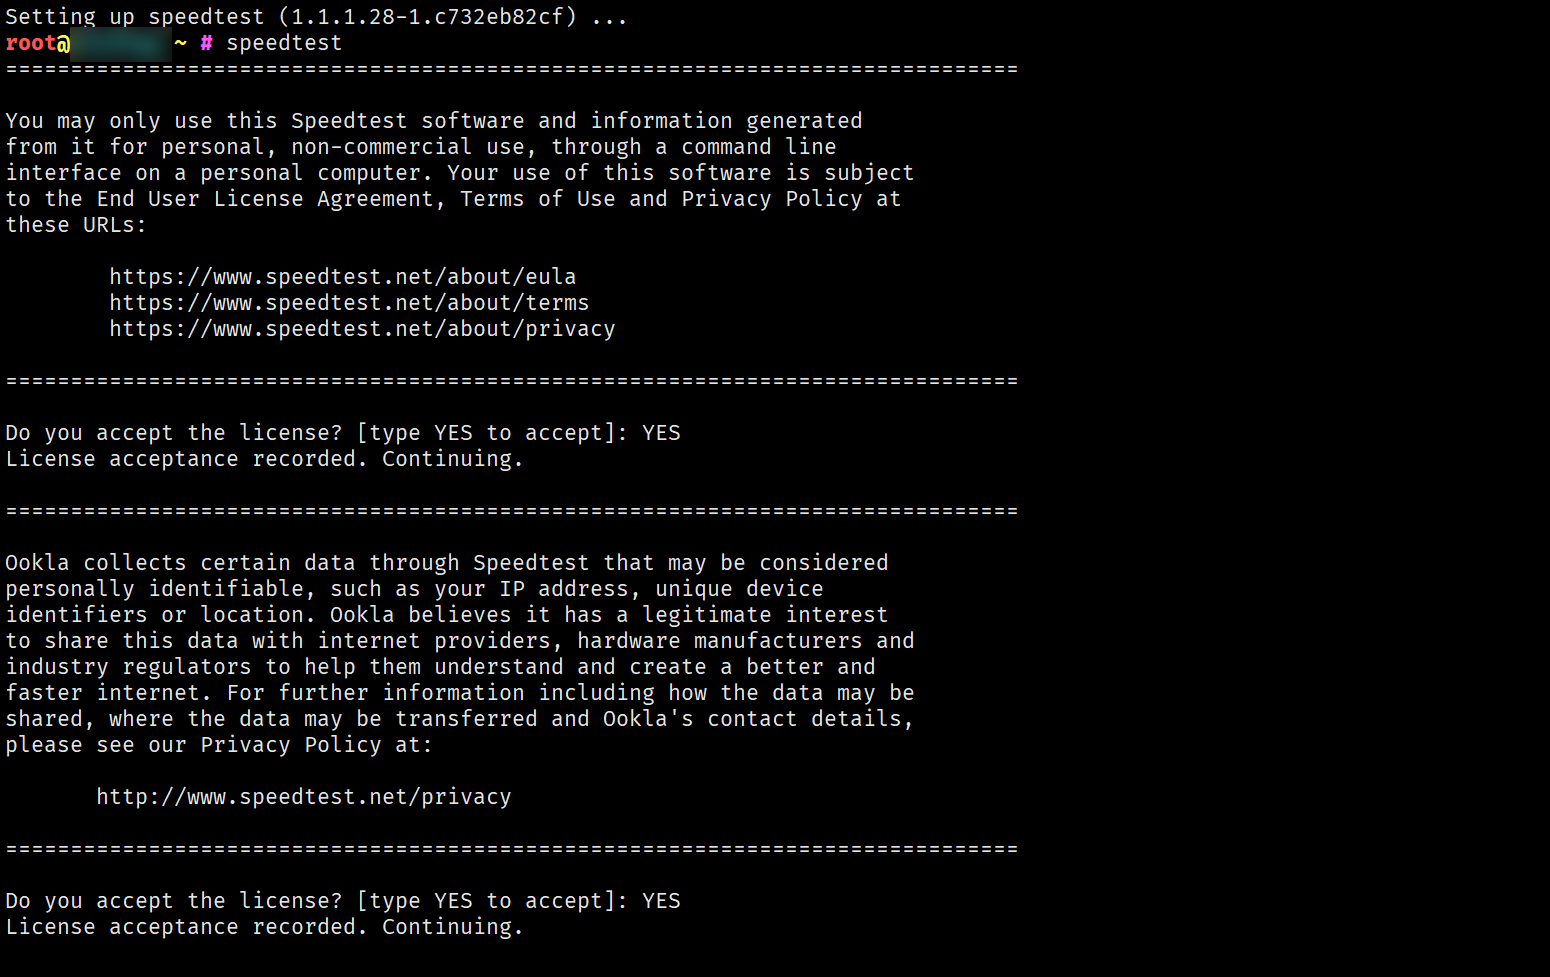
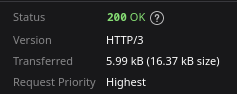
Debian 使用 Speedtest CLI 进行测速 本文将指导如何在 Debian 12 和 Ubuntu 22.04 下安装并使用 Speedtest CLI 进行测速。安装 Speedtest CLISpeedtest CLI 是 Ookla 官方推出的 Linux / BSD 下的 CLI 工具,方便我们在服务器里直接测试公网带宽速度。首先,导入 GPG Key 并添加源:apt install -y lsb-release ca-certificates apt-transport-https curl gnupg dpkg curl -sSL https://packagecloud.io/ookla/speedtest-cli/gpgkey | gpg --dearmor > /usr/share/keyrings/speedtest.gpg echo "deb [arch=$(dpkg --print-architecture) signed-by=/usr/share/keyrings/speedtest.gpg] https://packagecloud.io/ookla/speedtest-cli/debian/ $(lsb_release -sc) main" > /etc/apt/sources.list.d/speedtest.list apt install -y lsb-release ca-certificates apt-transport-https curl gnupg dpkg curl -sSL https://packagecloud.io/ookla/speedtest-cli/gpgkey | gpg --dearmor > /usr/share/keyrings/speedtest.gpg echo "deb [arch=$(dpkg --print-architecture) signed-by=/usr/share/keyrings/speedtest.gpg] https://packagecloud.io/ookla/speedtest-cli/ubuntu/ $(lsb_release -sc) main" > /etc/apt/sources.list.d/speedtest.list 然后更新系统并安装 speedtest:apt update apt install speedtest -y 使用 Speedtest CLI安装完毕后我们即可使用默认的 speedtest 命令选择最近的节点并使用默认的网络测速,提示 Do you accept the license? [type YES to accept] 时,输入 YES 并回车即可:高级用法输入 speedtest -h 即可查看 speedtest 的命令参数:root@debian ~ # speedtest -h Speedtest by Ookla is the official command line client for testing the speed and performance of your internet connection. Version: speedtest 1.1.1.28 Usage: speedtest [<options>] -h, --help Print usage information -V, --version Print version number -L, --servers List nearest servers -s, --server-id=# Specify a server from the server list using its id -I, --interface=ARG Attempt to bind to the specified interface when connecting to servers -i, --ip=ARG Attempt to bind to the specified IP address when connecting to servers -o, --host=ARG Specify a server, from the server list, using its host's fully qualified domain name -p, --progress=yes|no Enable or disable progress bar (Note: only available for 'human-readable' or 'json' and defaults to yes when interactive) -P, --precision=# Number of decimals to use (0-8, default=2) -f, --format=ARG Output format (see below for valid formats) --progress-update-interval=# Progress update interval (100-1000 milliseconds) -u, --unit[=ARG] Output unit for displaying speeds (Note: this is only applicable for ‘human-readable’ output format and the default unit is Mbps) -a Shortcut for [-u auto-decimal-bits] -A Shortcut for [-u auto-decimal-bytes] -b Shortcut for [-u auto-binary-bits] -B Shortcut for [-u auto-binary-bytes] --selection-details Show server selection details --ca-certificate=ARG CA Certificate bundle path -v Logging verbosity. Specify multiple times for higher verbosity --output-header Show output header for CSV and TSV formats Valid output formats: human-readable (default), csv, tsv, json, jsonl, json-pretty Machine readable formats (csv, tsv, json, jsonl, json-pretty) use bytes as the unit of measure with max precision Valid units for [-u] flag: Decimal prefix, bits per second: bps, kbps, Mbps, Gbps Decimal prefix, bytes per second: B/s, kB/s, MB/s, GB/s Binary prefix, bits per second: kibps, Mibps, Gibps Binary prefix, bytes per second: kiB/s, MiB/s, GiB/s Auto-scaled prefix: auto-binary-bits, auto-binary-bytes, auto-decimal-bits, auto-decimal-bytes比较实用的有:指定出口网卡:speedtest -I 指定网卡名称 指定出口 IP:speedtest -i IP 地址 注意指定网卡或 IP 后可能会出现 [error] Error: [0] Cannot open socket 的错误提示,忽略即可。查看附近的测速节点列表:speedtest -L 指定某个测速节点:speedtest -s 测速节点 ID 最后秀一下我们的 40Gbps 公网带宽服务器:
-
Debian / Ubuntu 手工添加 Swap 分区 本文将指导如何在 Debian 11 和 Ubuntu 22.04 下手工添加 Swap 分区。准备工作首先,检查你的系统是否已经有 Swap 分区:swapon -s 或free -m 如果没有返回结果或者 free -m 中 Swap 一列数值是 0,则表示你的系统没有 Swap 分区。创建 SWAP 分区我们可以使用 fallocate 命令创建一个 1GB 大小的 Swap 分区:fallocate -l 1G /swapfile 如果这个命令无法使用,请安装 util-linux 包:apt install util-linux 然后设置这个文件的权限:chmod 600 /swapfile 然后激活 SWAP 分区mkswap /swapfile swapon /swapfile 此时,你可以使用 swapon -s 或 free -m 命令查看 Swap 分区是否已经激活。设置开机自启我们需要编辑 /etc/fstab 这个文件,加入下面的内容即可:echo "/swapfile swap swap defaults 0 0" >> /etc/fstab 大功告成,使用 free -m 命令查看 Swap 分区是否正确:调整系统内核 Swappiness 值Swapiness 是 Linux 内核的一个属性,定义了系统使用交换空间的频率,Swapiness 的值在 0 到 100 之间 (默认是 60),一个低的值会使内核尽可能地避免交换,而一个高的值会使内核更积极地使用交换空间。这个值默认是 60,我们可以使用 cat /proc/sys/vm/swappiness 命令查看当前值。一般我们可以给他改成 10:echo "vm.swappiness=10" >> /etc/sysctl.conf 然后使用 sysctl -p 命令使其生效。关闭 Swap有时候我们需要关闭 Swap 分区,可以使用下面的命令:首先,停用 Swap 分区:swapoff -v /swapfile 然后检查 /etc/fstab,删除 /swapfile swap swap defaults 0 0 这一行。最后删除 /swapfile 这个文件:rm /swapfile
-
Debian / Ubuntu 安装 Caddy 本文将指导如何在 Debian 和 Ubuntu 下安装 Caddy。什么是 Caddy?Caddy 是一款开源的 Web 服务器,它设计简单,易于使用,并且有很多强大的功能。它可以自动处理 TLS (SSL),并且可以使用中间件扩展功能。Caddy 采用简单的配置语法,可以轻松配置路由,反向代理,重定向,缓存和其他功能。它还支持 HTTP/2,QUIC (HTTP/3) 和 WebSockets 协议,可以提供快速的网络性能。为什么尝试 Caddy?对我来说比较简单的原因是 nginx-quic 这个项目一直未发布正式版,想要一款简单的能支持 HTTP/3 的 Web 服务器软件,目前来说 Caddy 的选择是最合适的。Caddy 还支持自动化证书,对于懒人来说特别合适。安装 Caddy我们按照官方的安装方法,首先,安装一些必要的软件包:apt update apt upgrade -y apt install curl vim wget gnupg dpkg apt-transport-https lsb-release ca-certificates 然后加入 Caddy 的 GPG 公钥和 apt 源:curl -sSL https://dl.cloudsmith.io/public/caddy/stable/gpg.key | gpg --dearmor > /usr/share/keyrings/caddy.gpg echo "deb [arch=$(dpkg --print-architecture) signed-by=/usr/share/keyrings/caddy.gpg] https://dl.cloudsmith.io/public/caddy/stable/deb/debian any-version main" > /etc/apt/sources.list.d/caddy.list 然后更新系统后即可安装 Caddy:apt update apt install caddy 配置 Caddy默认的 Caddyfile 文件位于 /etc/caddy/Caddyfile,官方的教程在这儿,如果你习惯了 Nginx 和 Apache 的配置,那么此时应该会非常不习惯,我们就来一个最简单的例子把:我们需要绑定域名 example.com这个域名的文件位于 /var/www/example.com,默认首页文件名为 index.html我们需要开启 SSL 访问,并且访问 http 跳转到 https我们需要设置开启 TLS 1.2 和 TLS 1.3,并开启 HSTS Preload首先,设置 http://example.com/ 跳转到 https://example.com/:注意:默认情况如果下面的 example.com:80 和 example.com:443 没有配置其他的端口,Caddy 会自动使用 443 端口,并自动开启 http://example.com/ 跳转到 https://example.com/,这里的示范是为了给有些奇怪的需求比如一些特定的端口访问 HTTP 和 HTTPS,则需要手动配置。example.com:80 { redir https://{host}{uri} permanent } 然后我们按照 Mozilla 的推荐配置写入 Caddyfile:example.com:443 { tls { protocols tls1.2 tls1.3 ciphers TLS_ECDHE_ECDSA_WITH_AES_128_GCM_SHA256 TLS_ECDHE_RSA_WITH_AES_128_GCM_SHA256 TLS_ECDHE_ECDSA_WITH_AES_256_GCM_SHA384 TLS_ECDHE_RSA_WITH_AES_256_GCM_SHA384 TLS_ECDHE_ECDSA_WITH_CHACHA20_POLY1305_SHA256 TLS_ECDHE_RSA_WITH_CHACHA20_POLY1305_SHA256 } header { Strict-Transport-Security "max-age=63072000; includeSubDomains; preload" Referrer-Policy strict-origin-when-cross-origin X-Frame-Options SAMEORIGIN X-Content-Type-Options nosniff X-XSS-Protection "1; mode=block" } root * /var/www/example.com file_server { index index.html } encode gzip zstd } 当然也可以设置 www.example.com 跳转 example.com:www.example.com:80 { redir https://example.com{uri} permanent } www.example.com:443 { redir https://example.com{uri} permanent } 然后把以上所有内容合并成一个 Caddyfile 文件,放到 /etc/caddy/Caddyfile,然后检查 Caddy 配置:caddy validate --config /etc/caddy/Caddyfile 输出如下内容则表示配置正确:root@debian ~ # caddy validate --config /etc/caddy/Caddyfile 2022/12/26 17:31:22.347 INFO using provided configuration {"config_file": "/etc/caddy/Caddyfile", "config_adapter": ""} 2022/12/26 17:31:22.349 WARN http server is listening only on the HTTP port, so no automatic HTTPS will be applied to this server {"server_name": "srv1", "http_port": 80} 2022/12/26 17:31:22.349 INFO http enabling automatic HTTP->HTTPS redirects {"server_name": "srv0"} 2022/12/26 17:31:22.349 INFO tls.cache.maintenance started background certificate maintenance {"cache": "0xc00018ad90"} 2022/12/26 17:31:22.350 INFO tls.cache.maintenance stopped background certificate maintenance {"cache": "0xc00018ad90"} Valid configuration 有强迫症的也可以把你的 Caddyfile 文件美化一下:caddy fmt /etc/caddy/Caddyfile --overwrite 最后重启 Caddysystemctl restart caddy 耐心等待自动签发 SSL 证书,然后我们就可以打开浏览器控制台查看 https://example.com/ 即可看到 SSL 证书已经自动部署,同时 HTTP/3 已经开启了:更多的配置可以参考官方文档或《Caddyfile 语法浅析》
-
Debian / Ubuntu 使用 xcaddy 自定义编译 Caddy 本文将指导使用 xcaddy 自定义编译 Caddy。上一篇文章介绍了如何安装使用 Caddy,但是 Caddy 的功能有时候并不能满足业务需求,如果想要使用更多的功能,就需要自定义编译 Caddy。xcaddy 是 Caddy 官方制作的用于自定义编译 Caddy 的工具,它可以帮助我们快速的编译出符合自己需求的 Caddy。安装 xcaddy我们按照官方的安装方法,首先,安装一些必要的软件包:apt update apt upgrade -y apt install curl vim wget gnupg dpkg apt-transport-https lsb-release ca-certificates 然后按照官方教程安装 Go:wget https://go.dev/dl/go1.22.1.linux-amd64.tar.gz rm -rf /usr/local/go && tar -C /usr/local -xzf go1.22.1.linux-amd64.tar.gz 然后把 go 加入系统环境变量:echo "export PATH=\$PATH:/usr/local/go/bin" >> /etc/profile 然后加入 Caddy 的 GPG 公钥和 apt 源:curl -sSL https://dl.cloudsmith.io/public/caddy/xcaddy/gpg.key | gpg --dearmor > /usr/share/keyrings/xcaddy.gpg echo "deb [arch=$(dpkg --print-architecture) signed-by=/usr/share/keyrings/xcaddy.gpg] https://dl.cloudsmith.io/public/caddy/xcaddy/deb/debian any-version main" > /etc/apt/sources.list.d/xcaddy.list 然后更新系统后即可安装 xcaddy:apt update apt install xcaddy 重启打开 SSH 后检查一下 go 和 xcaddy 的版本:root@debian ~ # go version go version go1.19.5 linux/amd64 root@debian ~ # xcaddy version v0.3.1 h1:XKmnGnGTeB53hLUgnGr/R4JbTNSxh8IBAFcJkrtycso= 自定义编译 Caddy我们可以选择一些自己喜欢的模块,比如缓存模块和 Brotli 压缩模块:xcaddy build \ --with github.com/caddyserver/cache-handler \ --with github.com/ueffel/caddy-brotli 经过一段时间的编译以后,我们就可以在当前目录下看到一个名为 caddy 的二进制文件,这就是我们自定义编译的 Caddy 了。自定义 Caddy 和系统 Caddy 共存如果我们想要自定义 Caddy 和系统 Caddy 共存,可以使用官方的教程:首先,按照我们的教程安装 Caddy,安装完毕后,先停止 Caddy 服务:systemctl stop caddy 然后使用 dpkg-divert 命令将系统 Caddy 的二进制文件移动到 /usr/bin/caddy.default 并做软链接:dpkg-divert --divert /usr/bin/caddy.default --rename /usr/bin/caddy 然后把我们自己编译好的 Caddy 二进制文件移动到 /usr/bin/caddy.custom:mv ./caddy /usr/bin/caddy.custom 然后设置优先级,让我们的自定义 Caddy 优先启动:update-alternatives --install /usr/bin/caddy caddy /usr/bin/caddy.default 10 update-alternatives --install /usr/bin/caddy caddy /usr/bin/caddy.custom 50 此时我们可以看到默认的 /usr/bin/caddy 已经是我们自定义的 Caddy 了:root@debian ~ # ls -l /usr/bin/caddy lrwxrwxrwx 1 root root 23 Jan 22 10:52 /usr/bin/caddy -> /etc/alternatives/caddy* root@debian ~ # ls -l /etc/alternatives/caddy lrwxrwxrwx 1 root root 21 Jan 22 10:52 /etc/alternatives/caddy -> /usr/bin/caddy.custom 我们也可以使用 update-alternatives --config caddy 命令来切换系统安装的 Caddy 和自定义的 Caddy:root@be ~ # update-alternatives --config caddy There are 2 choices for the alternative caddy (providing /usr/bin/caddy). Selection Path Priority Status ------------------------------------------------------------ * 0 /usr/bin/caddy.custom 50 auto mode 1 /usr/bin/caddy.custom 50 manual mode 2 /usr/bin/caddy.default 10 manual mode Press <enter> to keep the current choice[*], or type selection number: 我们可以看到默认的 Caddy 二进制文件是我们自定义的,你可以输入 0 (按照优先级自动) 1 (手工切换自定义 Caddy) 或 2 (使用系统默认 Caddy) 来修改并切换默认的 Caddy 版本。